Nvitop has quickly become a go-to tool for developers, data scientists, and system administrators who rely on NVIDIA GPUs for heavy workloads. Whether you are training deep learning models, running inference, or managing shared GPU servers, having clear, real-time visibility into GPU usage is essential.
Nvitop delivers that insight through a fast, terminal-based interface that goes far beyond traditional monitoring tools. Before taking advantage of its powerful features, however, the first step is understanding how to install it correctly and ensure it runs smoothly in your environment.
Nvitop and Why It Exists
Before diving into installation commands, it helps to understand what nvitop actually is and why it was created. GPU monitoring has traditionally relied on nvidia-smi, a reliable but limited tool that shows GPU usage in a static, snapshot-style output. While useful, it lacks interactivity, per-process clarity, and a user-friendly interface for long-running sessions.
nvitop was developed to fill that gap. It provides a top-like experience for NVIDIA GPUs, similar in spirit to tools like htop or top, but tailored for CUDA workloads. It displays GPU utilization, memory usage, temperature, power draw, and per-process details in real time, all within a terminal interface that updates dynamically.
What makes nvitop particularly attractive is its Python foundation. Because it is distributed as a Python package, installation and updates are straightforward, especially for users already working in virtual environments, Conda environments, or containerized systems.
Why pip is the Preferred Installation Method
pip is the standard package installer for Python and is available in virtually every Python environment. Using pip to install tools like nvitop offers several advantages over manual installation or system package managers.
First, pip handles dependency resolution automatically. nvitop relies on Python libraries that interface with NVIDIA’s management APIs, and pip ensures the correct versions are installed together. Second, pip integrates seamlessly with virtual environments, allowing users to install nvitop without affecting system-wide Python packages. Third, updates and uninstallation are clean and reversible.
Because nvitop is actively maintained and frequently updated to support new GPU architectures and driver behaviors, installing via pip ensures access to the latest stable version with minimal effort.
The Exact Command to Install nvitop via pip
The installation itself is refreshingly simple. The command used to install nvitop via pip is:
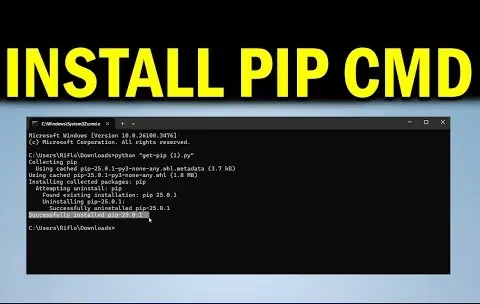
pip install nvitop
This command tells pip to download the nvitop package from the Python Package Index and install it into the active Python environment. If you are using Python 3 and your system differentiates between pip versions, you may also see:
pip3 install nvitop
Both commands accomplish the same goal, provided they point to the Python interpreter you intend to use.
What Happens When You Run the Installation Command
Running the pip install command triggers a series of automated steps that are worth understanding, especially if you manage multiple environments or deploy tools across servers.
pip first checks the package index for the latest compatible version of nvitop. It then resolves all required dependencies, downloading and installing them in the correct order. Once installation is complete, pip registers the nvitop command-line entry point, making it accessible directly from the terminal.
Behind the scenes, nvitop interfaces with NVIDIA’s Management Library through Python bindings. This means that while nvitop itself is installed via pip, it still relies on properly installed NVIDIA drivers and CUDA support at the system level.
System Requirements You Should Verify Before Installation
Although the installation command is simple, nvitop assumes certain prerequisites are already in place. Ignoring these can lead to confusing errors or incomplete functionality.
You should confirm that your system meets the following conditions:
- NVIDIA GPU hardware is present and recognized by the system
- NVIDIA drivers are installed and compatible with your GPU
- Python 3.7 or newer is available in your environment
- pip is installed and up to date
If nvidia-smi does not work on your system, nvitop will not be able to retrieve GPU metrics, regardless of how successfully it installs via pip.
Installing nvitop in Virtual Environments
Many Python users rely on virtual environments to isolate dependencies between projects. Nvitop works perfectly in this context and is often best installed inside the environment where it will be used.
When you activate a virtual environment and run the pip install command, nvitop becomes available only within that environment. This is particularly useful when working on shared systems or research servers where you do not have administrative privileges.
For example, activating a virtual environment and installing nvitop ensures that it does not conflict with other users’ tools or system-wide Python packages.
Using pip with Conda Environments
Conda users often wonder whether pip-based installations are safe inside Conda environments. In the case of nvitop, using pip inside a Conda environment is generally acceptable and widely practiced.
The key is to activate the Conda environment first, then run the pip install command. This ensures that nvitop is installed into the correct environment and uses the environment’s Python interpreter.
While Conda itself does not distribute nvitop as a core package, pip remains the recommended method even in Conda-based workflows.
Verifying That nvitop is Installed Correctly
After installation, verification is an important step that many users skip. Confirming that nvitop runs correctly saves time later when troubleshooting.
The simplest verification method is to run:
“nvitop” If the tool launches and displays GPU statistics, the installation was successful. If the command is not found, it usually means that pip installed nvitop into a different environment than the one currently active.
Another way to verify installation is to check the package list:
“pip show nvitop” This confirms that pip recognizes nvitop as an installed package and provides version information.
Common Installation Issues and How to Resolve Them
Despite its simplicity, installing nvitop via pip can occasionally run into issues. Most problems fall into a small number of categories.
One common issue is permission errors when installing globally. This can be resolved by using a virtual environment or adding the --user flag to the pip command. Another frequent problem is mismatched Python versions, where pip installs nvitop for one interpreter but the user runs another.
Driver-related issues are also common. nvitop depends on NVIDIA’s system-level drivers, and outdated or incompatible drivers can prevent proper GPU detection even when installation succeeds.
Pip, PATH, and Command Availability
When pip installs a command-line tool like nvitop, it places an executable script in a directory that must be included in your system’s PATH. If that directory is missing from PATH, the command will not be recognized.
This situation often arises on macOS or Linux systems, where user-level pip installs place executables in a local bin directory. Adding that directory to PATH resolves the issue permanently.
Understanding this relationship between pip, installation directories, and PATH helps prevent confusion when tools appear to install correctly but fail to run.
Updating nvitop with pip
Keeping NVitop up to date ensures compatibility with new GPUs and driver changes. Updating is as straightforward as installation. Running the pip upgrade command fetches the latest version and replaces the existing one without affecting configuration or usage patterns. Regular updates are especially important in research environments where GPU drivers are frequently updated. Because pip handles versioning automatically, updating nvitop rarely introduces breaking changes, making it safe to keep current.
Uninstalling nvitop Cleanly
There may be times when you need to remove nvitop, such as when cleaning up environments or troubleshooting conflicts. pip provides a clean uninstallation process.
The uninstall command removes the package and its entry points without affecting unrelated dependencies. This makes experimentation low-risk and reversible.
Uninstallation is particularly useful when diagnosing issues related to environmental contamination or conflicting package versions.
How NVitop Compares to Other GPU Monitoring Tools
Nvitop does not exist in isolation. It is part of a broader ecosystem of GPU monitoring solutions, each with its own strengths. Unlike static tools, nvitop provides real-time updates and interactive controls. Compared to graphical monitoring applications, it is lightweight and accessible over SSH sessions. Compared to scripting-based tools, it offers immediate visual insight without additional setup. This balance between power and simplicity is why many users choose nvitop as their default GPU monitoring tool after installing it via pip.
Performance and Overhead Considerations
A natural concern when running monitoring tools is overhead. nvitop is designed to be efficient and minimally intrusive. Because it relies on NVIDIA’s management interfaces rather than continuous polling at the kernel level, its impact on GPU performance is negligible in most workloads. CPU usage is also modest, making it suitable for long-running monitoring sessions. This efficiency is one of the reasons nvitop is widely adopted in production and research environments alike.
Best Practices for Using nvitop in Shared Systems
On shared servers or clusters, monitoring tools must be used responsibly. nvitop provides visibility into GPU usage, but it should not be abused to interfere with other users’ workloads.
Responsible usage includes avoiding unnecessary refresh rates, respecting access policies, and using monitoring for observation rather than intervention. When installed via pip in user environments, nvitop respects these boundaries by default. Understanding these practices ensures that nvitop remains a helpful tool rather than a source of conflict.
Advanced Usage After Installation
Once installed, nvitop offers more than basic monitoring. Users can customize views, filter processes, and switch between GPUs using keyboard controls.
Advanced users often integrate nvitop into their daily workflow by running it alongside training scripts or inference jobs. This provides immediate feedback on resource usage and helps diagnose bottlenecks in real time. Although installation is a single command, the depth of functionality available afterward is significant.
Why Nvitop Is Popular in Machine Learning Workflows
Machine learning workloads are uniquely demanding, often running for hours or days on expensive hardware. Visibility into GPU usage is critical for efficiency and cost control.
nvitop’s real-time, per-process insights allow practitioners to spot idle GPUs, memory leaks, and runaway processes quickly. This makes it a natural fit for deep learning research, production inference systems, and multi-user training clusters. Its pip-based installation lowers the barrier to entry, encouraging widespread adoption.
Security and Trust Considerations
Installing any package via pip raises questions about security and trust. nvitop benefits from being open-source and widely used, which increases transparency and community scrutiny.
By installing nvitop from the official package index and keeping it updated, users minimize risk. Using virtual environments further isolates potential issues and aligns with best practices for Python development. Security-conscious users often review package metadata and dependencies, which pip makes easy to inspect.
Two Practical Scenarios Where nvitop Shines
In real-world usage, nvitop proves its value in a variety of scenarios. Two common ones stand out clearly.
- Debugging training performance when GPU utilization is unexpectedly low
- Monitoring multi-user GPU servers to identify resource contention
In both cases, the ability to install nvitop quickly via pip and run it immediately makes it an indispensable tool.
When pip Might Not Be Enough
Although pip installation works for most users, there are edge cases where additional steps are required. Minimal container images, restricted systems, or unusual driver setups can complicate installation.
In such cases, users may need to install system libraries or adjust environment variables before nvitop functions correctly. However, these scenarios are exceptions rather than the norm.
Understanding that pip handles the Python side, while drivers handle the hardware side, helps clarify where responsibility lies when troubleshooting.
Final Thoughts on Installation Simplicity
One of nvitop’s greatest strengths is how easy it is to install and start using. The pip command abstracts away complexity, allowing users to focus on monitoring rather than setup.
This simplicity does not come at the expense of power. Once installed, nvitop provides professional-grade insights into GPU usage that rival much heavier tools. The balance between ease of installation and depth of functionality is what makes nvitop stand out.
Conclusion
The question of how to install nvitop via pip has a simple, direct answer, but understanding the context around that answer adds real value. The command itself is easy to remember and quick to execute, yet it unlocks a powerful monitoring tool that fits naturally into Python-based GPU workflows. By using pip, users benefit from straightforward installation, easy updates, and clean environment management. Whether you are a researcher, engineer, or system administrator, mastering this installation process is a small step that pays dividends in visibility, efficiency, and control over GPU resources.